ANALYZING THE SIEGE OMEGA SUPREME

It's being a long time I didn't update posts on my blog, my apologies, I'm been busy-ing a lot of stuff for this Chinese New Year period. For the first posts since I stopped for a long time, this time I want to talk about the figures will release in this September, the War For Cybertron Siege titan class Omega Supreme.
Hasbro has announced the voted titan class figure not long ago, the last few weeks they also announce the releasing date of this huge figure, I saw a lot of images on the toys fair, Omega Supreme and others look amazing, or I say, amazingly G1-ish. (I am in G1 faction, hehe) Since when the last official Omega Supreme figure was release? Over ten years? It's time to go full G1! Masterpiece also doing it. (third parties doesn't count) (and, I am so gonna get this figure when it releases)
What I wanna talk about this time is the alt mode to robot mode on this titan class Omega Supreme, like predicting the transformation steps of this huge figure, or more like, analyzing how it works. Below are some images I started from zero builds by using a 3D modeling program, it is not 100 % accurate, and it looks ugly, but I don't want to waste so many times on decorating the model, I just want to show how the figure works. The titan class figure itself is actually not that complicated on the transformations, it is quite simple when you get to know the figure.
(AND SO, SPOILER ALERT!)
Don't say I didn't warn ya!
This is the 3D model of the Siege Omega Supreme (O.S.). I have been using roughly a day to model this thing, it is just a 3-dimensional model made out by blocks.

The original image for comparison.

The back of the O.S. model.

The below are the separated robot parts of Omega Supreme, he is also a part-former like the G1 O.S., but the new O.S. only separated into four main parts (modules).
The central module of the figure, this is the tank module in robot mode.

The back of the tank module. (the black parts on the module us the tank treat)

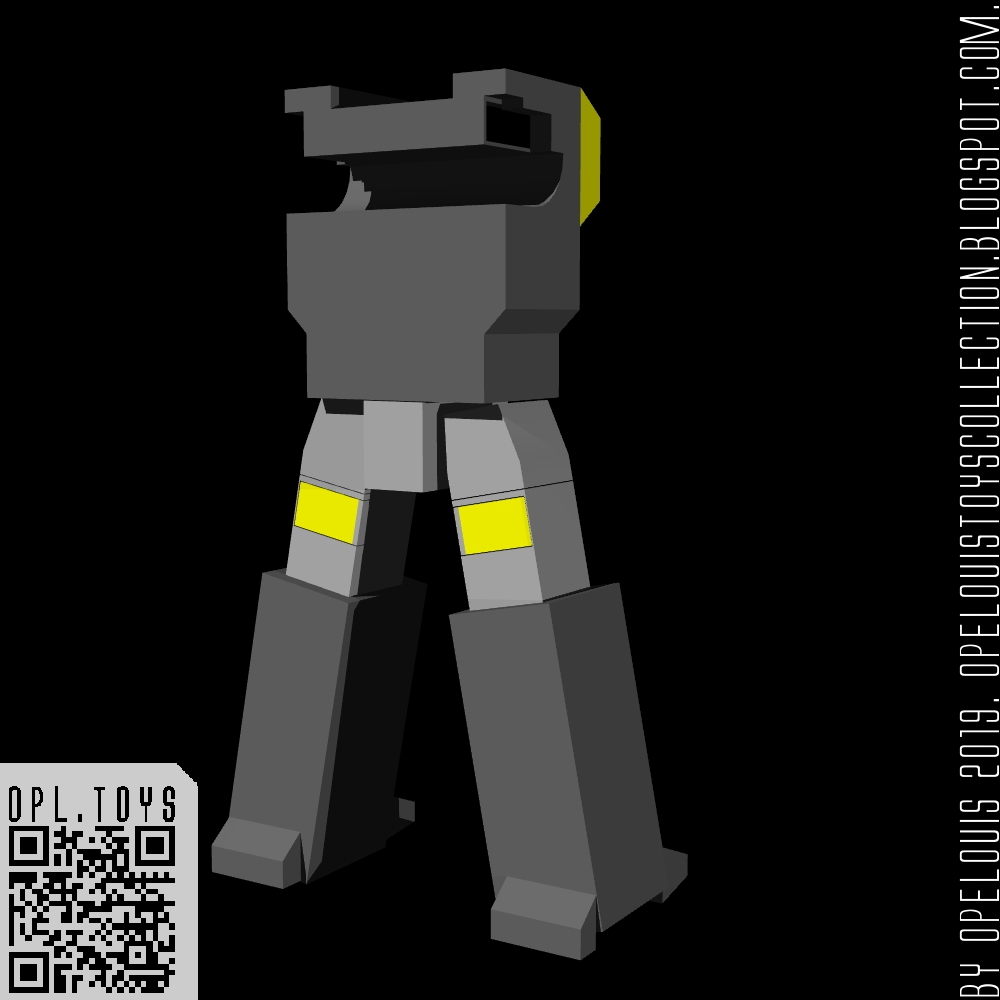
The main body, this is the launch pad of the base mode.

Back of the module. (I think the back of the thigh is yellow like, that is for the base mode)

The rocket module in robot mode.

The back. (part of the rocket panels become backpack of the bot mode)

The tracks in robot mode.

The base mode of Omega Supreme.

The prototype on the Toy Fair 2019 for comparison.

The back of the base. (still not sure what the yellow panels on the lower legs do, maybe for storing Micromasters?)

The dorsal view of the base.

Tank module in alt mode. (now show the separated parts in alt mode for forming the base)

The back of the tank. (the turret is actually separated from the head, I think it can't rotate in the tank mode)

The hood can be open for storing Micromasters, kind of look like a garage for vehicles.

The launch pad without the tracks.

The back of the launch pad.

The rocket. (in the photo, the rocket is even taller than the figure)

The other way of the rocket.

The tracks of the base mode.

The bottom of the tracks.

Now, I showed you all the details parts in the pictures above, it's time to do the transformations! Started with the alt mode, the base!

So, when you need to transform this figure, you have to separate the whole base mode like this. (it is a part-former, you know...)

First, I want to start with the launch pad, this will form the main body of the huge bot.

Fold down the bridge on the thigh and its collapse into the thigh.

Turn the waist 180. (yes, there is a waist for Omega Supreme!)

Fold the knee joint out 90 degrees. (the real one will be so bulky)

And then swing the legs inwards 90 degrees.

With the main body is finished, now to the rocket.

There are two small panels that can be open like this, the shoulder of the robot mode is hidden beneath it.

Then extend the top and bottom of the rocket like this. (I'm not sure if there will be a locking mechanism for the forearms)

Turn the rocket sideways like this.

Flip open this panels like this.

This is how it looks the other way.

There is a black color arm connect the panels, pull it out like this.

Fold the small panels to smaller size, and then fold them into the bigger panels like in the pic showed.

And then swing down the panels like this, this will form an oxygen tank-like backpack. (this looks really cool, as the G1 version is looking like an unfinished rocket backpack on the back.)

By the way, the top of the rocket can store a Micromaster in it, it is a very cool feature. (I heard that the head of the Omega Supreme can also store a Headmaster)
Continue to the transformation. Collapse the tip of the rocket in like this. (this have to do after extended the arm)

Then swing the arms down 90 degrees.

Push down a bit the backpack for the back wings.

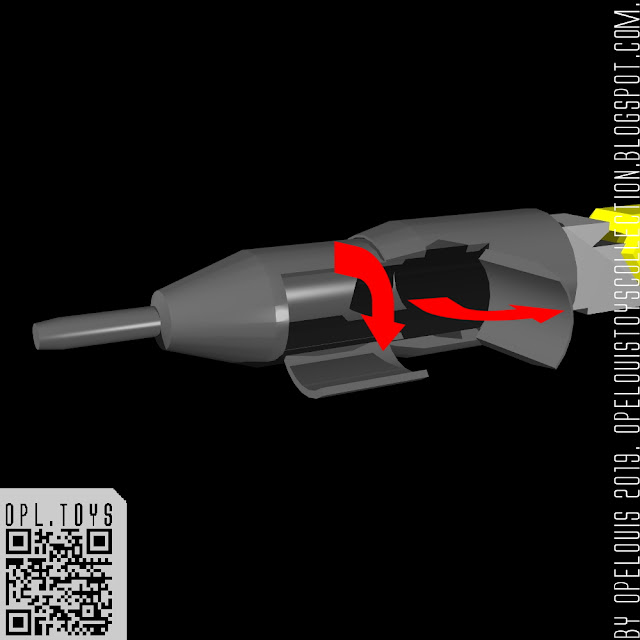
Put the rocket module aside and come to the tank. This is the most uncertain module transformations, because I can't really see how the tank works in most of the pictures on webs.

The rear bottom section of the tank will be folded down like the way in the picture show, against the front section of the tank. (I was not sure of this before I modeling the bottom parts of the tank, but after I saw a video on the Toy Fair 2019, it's confirmed that the bottom of the tank will fold like this)

Flip up the front hood of the tank. This is the way I guessed how the tank turret parts works, not 100 % accurate. As the turret is attached on the back of the chest plate, the chest plate should be flipping around and tuck the turret into the lower front section of the tank.

Slide down the chest panel, and extend it out.

I think the turret can be lowered close to the chest plate and collapse down. now there should have enough clearance to get through to the back. (not really sure on this area)

When the turret getting through the hole, turn the turret over and push it down into the front of the tank.

Fold down the neck panel like this. (I think the neck panel is connected with multiple hinges, can't figure out how it really work)

Collapse the guns on the chest. (I am not really sure this is collapsible, but seems it has to be done to put these parts underneath the yellow chest panel on the main body)

Then fold down from the middle.

Don't forget to fold up the ponytail on the back of the head, haha. (the real turret gun is put away, and replace by this ponytail, this is more cartoon accuracy)

Next, the tracks.

Turn it upside down, and fold down the four panels on each corner.

Then collapse the tracks like this. (no need to worry about the middle panels on the tracks, it will simply collapse together)

The wings are finished!

All four fully transform modules should combine like this position.

First, put the tank module into the main body.

Fold down the 3 panels on the main body, the side chest plates and the waist plate.

Next, install the rocket module on to the body like this, it should be locked in place.

Then flip up the backpack a little for the wings to puts on.

Put on the wings.

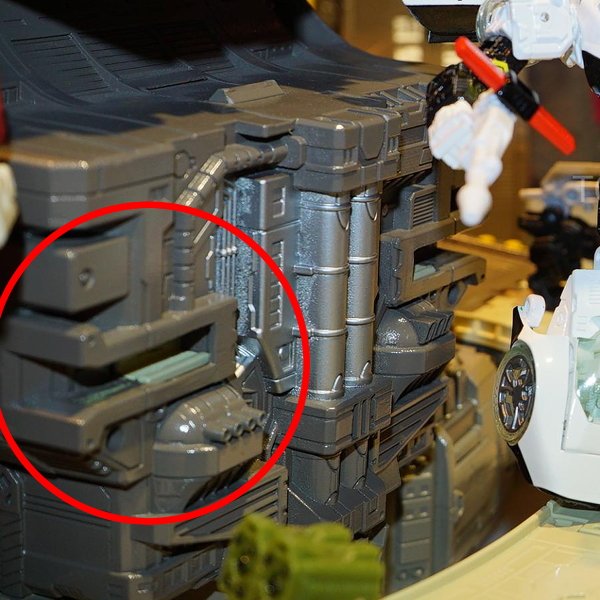
This is the groove on the lower back for plugging on the wings.

Now close down the backpack panels back to cover on the wings.

Don't forget to fold down the fingers (claws?) though.

The whole figure is completed! The real figure will look amazing on the display case with other figures. (Although the 3D model is ugly, I hope you can understand how it works, I try to make it as simple as possible)

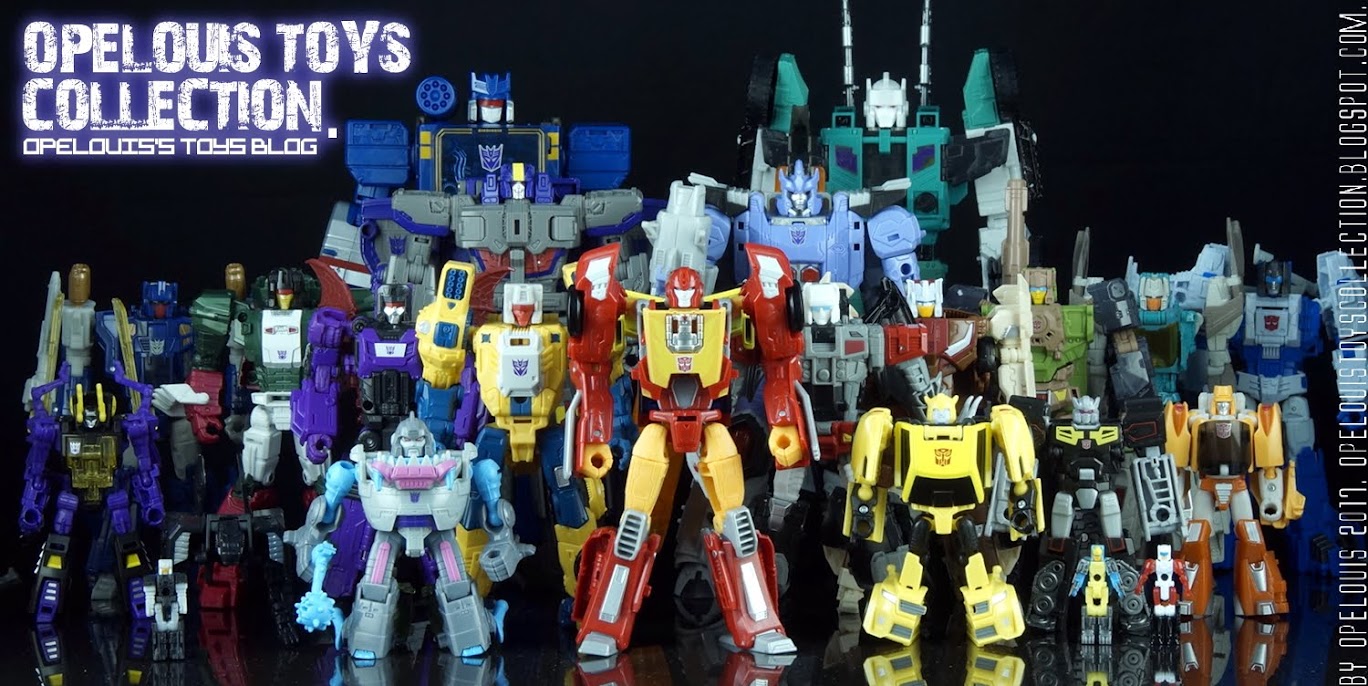
Photos from the Toy Fair 2019. All the figures on the table look great, hard to give up any one of them, probably will get all of the figures in this series, argh--- broke...
Check out the image of the Siege toy line in Toy Fair 2019 on TFW2005.com! Click HERE!

If you have any ideas or suggestions, please comment below.
Related posts:
WFCS COG
WFCS SKYTREAD
WFCS SIDESWIPE
WFCS HOUND
WFCS OPTIMUS PRIME
My graphic works:
3D modeling Gundam Frame
3D Guntank Onslaught
3D modeling MS-09 T2 Dom Habicht
3D modeling RX-79Tt GM Tuned
THANKS FOR WATCHING!
(AND SO, SPOILER ALERT!)
Don't say I didn't warn ya!
This is the 3D model of the Siege Omega Supreme (O.S.). I have been using roughly a day to model this thing, it is just a 3-dimensional model made out by blocks.

The original image for comparison.
The back of the O.S. model.

The below are the separated robot parts of Omega Supreme, he is also a part-former like the G1 O.S., but the new O.S. only separated into four main parts (modules).
The central module of the figure, this is the tank module in robot mode.

The back of the tank module. (the black parts on the module us the tank treat)

The main body, this is the launch pad of the base mode.

Back of the module. (I think the back of the thigh is yellow like, that is for the base mode)
The rocket module in robot mode.

The back. (part of the rocket panels become backpack of the bot mode)

The tracks in robot mode.

The base mode of Omega Supreme.

The prototype on the Toy Fair 2019 for comparison.

The back of the base. (still not sure what the yellow panels on the lower legs do, maybe for storing Micromasters?)

The dorsal view of the base.

Tank module in alt mode. (now show the separated parts in alt mode for forming the base)

The back of the tank. (the turret is actually separated from the head, I think it can't rotate in the tank mode)

The hood can be open for storing Micromasters, kind of look like a garage for vehicles.

The launch pad without the tracks.

The back of the launch pad.

The rocket. (in the photo, the rocket is even taller than the figure)

The other way of the rocket.

The tracks of the base mode.

The bottom of the tracks.

Now, I showed you all the details parts in the pictures above, it's time to do the transformations! Started with the alt mode, the base!

So, when you need to transform this figure, you have to separate the whole base mode like this. (it is a part-former, you know...)

First, I want to start with the launch pad, this will form the main body of the huge bot.

Fold down the bridge on the thigh and its collapse into the thigh.

Turn the waist 180. (yes, there is a waist for Omega Supreme!)

Fold the knee joint out 90 degrees. (the real one will be so bulky)

And then swing the legs inwards 90 degrees.

With the main body is finished, now to the rocket.

There are two small panels that can be open like this, the shoulder of the robot mode is hidden beneath it.

Then extend the top and bottom of the rocket like this. (I'm not sure if there will be a locking mechanism for the forearms)

Turn the rocket sideways like this.

Flip open this panels like this.

This is how it looks the other way.

There is a black color arm connect the panels, pull it out like this.

Fold the small panels to smaller size, and then fold them into the bigger panels like in the pic showed.

And then swing down the panels like this, this will form an oxygen tank-like backpack. (this looks really cool, as the G1 version is looking like an unfinished rocket backpack on the back.)

By the way, the top of the rocket can store a Micromaster in it, it is a very cool feature. (I heard that the head of the Omega Supreme can also store a Headmaster)

Continue to the transformation. Collapse the tip of the rocket in like this. (this have to do after extended the arm)

Then swing the arms down 90 degrees.

Push down a bit the backpack for the back wings.

Put the rocket module aside and come to the tank. This is the most uncertain module transformations, because I can't really see how the tank works in most of the pictures on webs.

The rear bottom section of the tank will be folded down like the way in the picture show, against the front section of the tank. (I was not sure of this before I modeling the bottom parts of the tank, but after I saw a video on the Toy Fair 2019, it's confirmed that the bottom of the tank will fold like this)

Flip up the front hood of the tank. This is the way I guessed how the tank turret parts works, not 100 % accurate. As the turret is attached on the back of the chest plate, the chest plate should be flipping around and tuck the turret into the lower front section of the tank.

Slide down the chest panel, and extend it out.

I think the turret can be lowered close to the chest plate and collapse down. now there should have enough clearance to get through to the back. (not really sure on this area)

When the turret getting through the hole, turn the turret over and push it down into the front of the tank.

Fold down the neck panel like this. (I think the neck panel is connected with multiple hinges, can't figure out how it really work)

Collapse the guns on the chest. (I am not really sure this is collapsible, but seems it has to be done to put these parts underneath the yellow chest panel on the main body)

Then fold down from the middle.

Don't forget to fold up the ponytail on the back of the head, haha. (the real turret gun is put away, and replace by this ponytail, this is more cartoon accuracy)

Next, the tracks.

Turn it upside down, and fold down the four panels on each corner.

Then collapse the tracks like this. (no need to worry about the middle panels on the tracks, it will simply collapse together)

The wings are finished!

All four fully transform modules should combine like this position.

First, put the tank module into the main body.

Fold down the 3 panels on the main body, the side chest plates and the waist plate.

Next, install the rocket module on to the body like this, it should be locked in place.

Then flip up the backpack a little for the wings to puts on.

Put on the wings.

This is the groove on the lower back for plugging on the wings.
Now close down the backpack panels back to cover on the wings.

Don't forget to fold down the fingers (claws?) though.

The whole figure is completed! The real figure will look amazing on the display case with other figures. (Although the 3D model is ugly, I hope you can understand how it works, I try to make it as simple as possible)

Photos from the Toy Fair 2019. All the figures on the table look great, hard to give up any one of them, probably will get all of the figures in this series, argh--- broke...
Check out the image of the Siege toy line in Toy Fair 2019 on TFW2005.com! Click HERE!

If you have any ideas or suggestions, please comment below.
Related posts:
WFCS COG
WFCS SKYTREAD
WFCS SIDESWIPE
WFCS HOUND
WFCS OPTIMUS PRIME
My graphic works:
3D modeling Gundam Frame
3D Guntank Onslaught
3D modeling MS-09 T2 Dom Habicht
3D modeling RX-79Tt GM Tuned
THANKS FOR WATCHING!
No comments:
Post a Comment